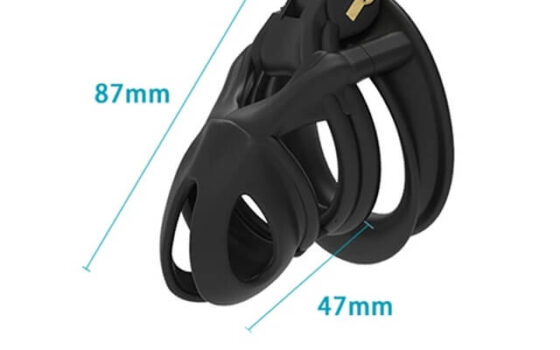
A removable chastity lock changes the cleaning routine: identify permitted disassembly, follow the lock's separate instructions, and never equate removal with cleanliness.
This guide is not medical advice. Stop use if significant pain, numbness, swelling, discoloration or circulation concerns occur.
If your lock can come out for cleaning, the whole hygiene routine gets easier — provided you know which parts the maker actually permits removing and what the lock’s own instructions say. Removability is a documented feature, not an assumption you can make from how loosely a part sits.
This guide covers the care side of removable locks using two documented kits. The general hygiene workflow is in the hygiene guide; the lock’s own rules in the lock-care guide.
Identify which parts the maker permits removing
Read the maker’s care text for the disassembly map: which components separate (cage from ring, lock from channel, belt from cage), and which connections stay fixed. The Viper kit’s integrated cylinder and the Chainmail Steel’s lock each have their own permitted disassembly per their listings — and the map differs between them, which is why the maker’s text, not memory, drives the routine.
Photograph your disassembled kit once per the parts-labeling method; the photo is the care map’s visual key and the inventory check at every cleaning.
Read separate lock instructions
The lock has its own document. Whatever the cage text permits — soaking, soap, brush — the lock’s channel, cylinder or shackle follows the lock maker’s limits, which the kit’s care text or the lock’s own documentation states separately. Water that cleans the body can be exactly what the mechanism’s documentation excludes.
Keep the two instruction sets together in the kit folder. When they disagree, the lock’s text wins for the lock — it is the component that must work every single time.
The Viper Chastity Cage V7.0 EVO
The integrated-cylinder kit with a documented removal path: The Viper V7.0 EVO’s integrated lock follows the kit’s own care text for what may be separated and cleaned — two flat keys, cylinder in the spine, and a care document that draws the line between body washing and lock servicing. Check: read that line before the first wash; the maker knows where the cylinder stops tolerating water.

Compare access to the cage surface
Removal changes what clean means: with the lock out, the cage’s channel and the ring’s contact path become fully reachable — brush, rinse, dry, inspect with nothing hidden. With the lock seated, the same surfaces clean partially and dry slower. Compare your routine before and after removal honestly: the removed-lock session should reach surfaces the assembled session cannot, or the removal step is being skipped in vain.
Open-structure kits show the difference dramatically: the Chainmail Steel’s mesh rinses through assembled, but the lock’s channel still wants its own attention — the access advantage applies to the surfaces the structure hides, not the ones it exposes.
Chainmail Steel Chastity Cage
And the open-structure contrast: The Chainmail Steel’s mesh rinses through in seconds, but its lock still follows separate limits — the clearest illustration that access and permission are different facts. Check: dry the lock mechanism completely after every session; trapped moisture at a lock channel is the classic failure the routine exists to prevent.

Do not equate removal with guaranteed cleanliness
Removal is access, not a result. The removed lock still needs the cleaning its instructions permit and a complete dry before storage; the cage with the lock out still wants the full wash and inspection. And removal never substitutes for the inspection step — surfaces that were hidden are exactly the surfaces to look at, not just to rinse.
The routine that works: remove what removes, clean each part by its own rules, dry everything completely, inspect what the removal revealed, reassemble, and record anything you found. Access converted to cleanliness is the point; access alone is just a disassembled dirty kit.
Removable locks earn their keep when the routine uses them: identify the permitted disassembly, follow the lock’s own instructions separately, clean the surfaces that removal reveals, and inspect rather than assume. Access is the opportunity; the completed routine is the result.
This guide includes promotional links to ChastityCage.co. For kits with documented removal paths, browse chastity cage kits at ChastityCage.co.
Related ChastityNow guides
- Chastity cage hygiene
- Chastity lock care