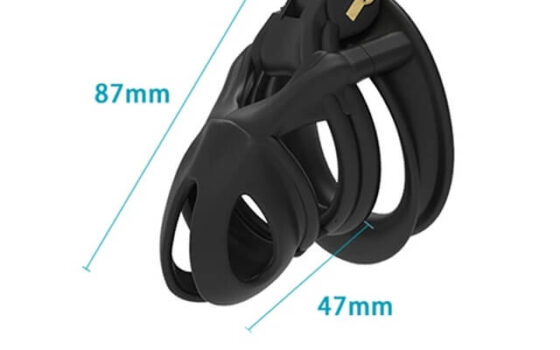
A narrow construction comparison between tube-style coverage and open-cage geometry, distinct from the broad open-versus-closed taxonomy.
This guide is not medical advice. Stop use if significant pain, numbness, swelling, discoloration or circulation concerns occur.
“Tube” and “cage” are often used interchangeably in shops, which makes comparison confusing. Here, tube means a substantially continuous shell and open cage means a body defined mainly by exposed spaces.
Construction changes the daily routine
| Criterion | Tube-style body | Open-cage body |
|---|---|---|
| Coverage | More continuous shielding | More exposed surface |
| Inspection | Interior may be harder to see | Skin and residue often easier to inspect |
| Cleaning access | Depends on vents and removal | Water access is usually more direct |
| Contact points | Broad internal surfaces | Bars, joints and edges |
| Profile | Can be smooth and compact | Can be airy but hardware may project |
Start with the routine, not the label
A wearer prioritizing coverage may accept more removal for complete cleaning. Someone prioritizing visual checks and rinse access may prefer an open body while still needing to clean junctions and locks.
Fit can reverse the apparent advantage
A tube’s continuous internal width and curve can create broad pressure; an open cage can create localized bar pressure or allow tissue through openings. Internal geometry must suit the wearer in both cases.
Cleaning depends on reachable surfaces
Vent holes do not make a tube fully accessible, and open bars do not clean themselves. Verify how every surface is washed, rinsed, dried and inspected after removal.
A practical shortlist test
Compare the narrowest internal dimensions, usable length, complete profile, lock and documented care. Choose only a design that can be removed promptly and maintained without improvisation.
Avoid the common shortcut
Do not assume open means safer or tube means more secure. Those outcomes depend on actual construction, fit and routine.
Verify the complete product evidence
Look for internal rather than exterior dimensions, the assembled weight, the narrowest usable space, ring and gap options, exact material, care instructions and a clear removal method. Product photos can show shape but rarely prove scale, finish or daily fit. When a listing omits a decision-critical fact, ask the seller or remove that design from the shortlist instead of filling the gap with an assumption.
Use the first tests to challenge the choice
Assemble and unlock the device off the body, then run an unlocked fit and short waking session. Include sitting, walking, bathroom alignment, cleaning and complete removal. The purpose is to look for reasons the design may not suit the wearer, not to confirm a purchase emotionally. Record pressure, movement, noise, drying and skin recovery. Only a repeatable, uneventful result supports another test.
Check support, returns and replacement parts
Read hygiene-related return limits before body contact and confirm whether rings, spacers, locks or other fit-critical parts are available separately. Clear technical support can matter more than a long feature list. Photograph a manufacturing defect before attempting any repair, and do not modify an unknown material or locking component while it is worn.
Continue with the relevant ChastityNow guides
The bottom line
Choose a tube or open cage by the coverage, access and contact pattern you can maintain. The label is only a starting point; the exact geometry and cleaning route decide daily suitability.
This article belongs to the Chastity Cages library, where the surrounding guides cover the wider topic.