A calm bathroom guide covering position, alignment, spray control, cleanup, public restrooms and when urination difficulty means immediate removal.
This guide is not medical advice. Stop use if significant pain, numbness, swelling, discoloration or circulation concerns occur.
Bathroom use is a fit-and-routine question, not a test of endurance. An open tip, enclosed shell, front hole and internal alignment can all change the stream. Try the process privately before relying on it at work or while travelling. Keep supplies simple, avoid forceful repositioning, and remove the device if normal urination is painful, obstructed or no longer possible.
The Simplest Answer: Positioning and Cleanup Matter
Begin with the position that gives the clearest path into the toilet. Some wearers find sitting reduces the need to aim; others can stand when the device opening remains reliably aligned. Either way, pause long enough to check the cage position before starting and avoid rushing because the hardware feels unfamiliar.
Afterward, deal with drips and trapped moisture rather than assuming they will dry on their own. Tissue, clean water and a way to pat accessible surfaces dry are usually more useful than complicated accessories. The goal is a repeatable process that leaves both the device and surrounding skin reasonably clean and dry.
Why Different Cage Designs Change Urine Flow
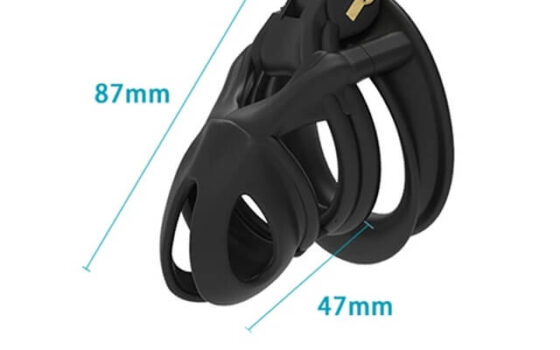
Open-bar designs may provide several paths for spray if the body is not aligned with the front opening. Enclosed tips can direct flow more narrowly but may also retain drops around an opening or inside a shell. A very short or angled cage changes where the opening sits, while movement inside a longer cage can change alignment from one visit to the next.
Anatomy, posture and bladder pressure add more variation. That is why advice that says one position always works should be treated cautiously. Test without forcing tissue toward an opening. If reliable alignment requires painful pressure or aggressive manipulation, the device configuration needs review rather than a more elaborate bathroom technique.
Sitting vs Standing
Sitting is often the simpler starting point, especially during early tests, but it is not a rule.
| Position | Possible advantage | Main check |
|---|---|---|
| Sitting | Less aiming and a wider margin for spray | Seat contact, cage angle and cleanup access |
| Standing | May suit an aligned open tip and familiar restroom | Direction, splash, privacy and stability |
Reducing Spray, Drips and Trapped Moisture
Check alignment before urinating, use a controlled flow when practical and keep tissue or clean water nearby. If the stream separates, sitting may reduce the mess. Do not twist the cage sharply or press hard against sensitive tissue merely to improve aim. A bathroom technique should not create new pressure points.
When finished, wait a moment for residual drops, blot accessible areas and inspect openings where moisture can remain. A small amount of water can help with a quick rinse where facilities allow, but rinsing is incomplete unless the area can also dry. Persistent dampness is a reason to shorten the session or remove the device for proper care.
Cleaning and Drying After Urination
A quick cleanup addresses the immediate visit: remove visible residue, rinse reachable surfaces if appropriate and pat dry. It does not replace the normal cleaning routine for the whole cage, lock, ring and skin. Enclosed or complex areas may need removal because water alone cannot confirm that every surface is clean.
Use mild products compatible with the known material and follow the maker’s care instructions. Avoid introducing harsh cleaners into enclosed spaces or leaving soap against skin. During the full routine, remove the device as agreed, wash all reachable surfaces, dry completely and inspect for redness, broken skin, odour or recurring moisture.
Using a Public or Workplace Restroom
Plan around the available privacy and supplies. A stall provides more flexibility for sitting, repositioning clothing and discreet cleanup. Carry only ordinary items you can use hygienically, such as tissue, an unscented wipe known to suit your skin or a small water bottle where appropriate. Dispose of waste normally and wash your hands.
Test the same clothing and cage at home first. Confirm that zips, buttons and waistbands do not block removal. If the restroom situation makes cleaning impractical, shorten the wear period or remove the device before the outing. Public use should follow a proven private routine, not become the first experiment.
Difficulty Urinating Is a Stop Signal
Pain, a markedly weak or obstructed flow, inability to urinate, new swelling or a sensation that tissue is trapped requires removal. Do not wait for a schedule, a partner’s convenience or a challenge target. Use the accessible key or release method, then reassess only after the immediate problem has resolved.
This guide cannot diagnose urinary symptoms. If normal urination does not return promptly after removal, or if symptoms are severe, persistent or worsening, seek qualified medical care. Do not reapply the device simply to test whether the same obstruction happens again.
Related ChastityNow guides
- Daily Wear library
- how a chastity cage should fit
- chastity safety basics
- the full cleaning routine
- device cleanability before choosing
Build the Bathroom Routine Before Extending Wear
A workable routine is predictable: align without force, use the position that controls the stream, clean what is reachable, dry carefully and remove the device when full care is needed. If the process stays messy, uncomfortable or unreliable after a calm private test, review the cage fit and design instead of treating the problem as something to tolerate.