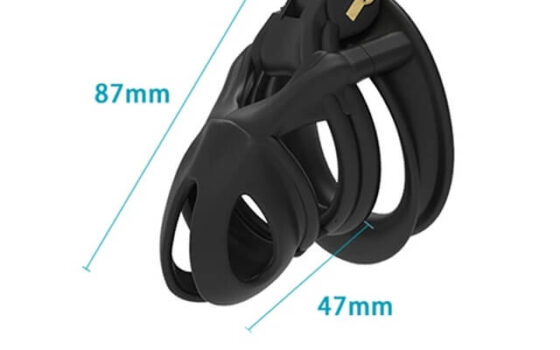
A broad architecture comparison that defines open and closed as a spectrum and keeps the tube-versus-open page narrower.
This guide is not medical advice. Stop use if significant pain, numbness, swelling, discoloration or circulation concerns occur.
Open and closed are ends of a spectrum. A heavily vented shell and a dense mesh may sit between them, so compare observable construction rather than forcing every product into a simple label.
Open and closed at a glance
| Criterion | Open architecture | Closed architecture |
|---|---|---|
| Exposed surface | More skin visible through openings | More continuous coverage |
| Water and air access | Often more direct | Depends on real vents and drainage |
| Contact pattern | Bars and junctions create local points | Broad interior surfaces create wider contact |
| Inspection | Residue and skin often easier to see | Hidden areas may require removal |
| Privacy | Less visual coverage | More shielding, not necessarily lower profile |
Start with the routine, not the label
Choose the maintenance and coverage trade-off you can actually support. Work, clothing, cleaning privacy and removal frequency may matter more than abstract security.
Fit can reverse the apparent advantage
Open bars can permit tissue through gaps or concentrate pressure; closed shells can trap broad compression or moisture. Both require correct internal dimensions and conservative tests.
Cleaning depends on reachable surfaces
Openings help rinse and inspect but leave joints and locks. Closed vents help but may not reach every interior surface. Regular removal remains the definitive access point.
A practical shortlist test
Compare opening size, internal width, finish, drainage, drying, complete profile and removal. Read care instructions before assuming a structure suits repeated wear.
Avoid the common shortcut
Do not call open “hygienic” or closed “secure” without examining the exact device. Architecture changes access and coverage, not every outcome.
Verify the complete product evidence
Look for internal rather than exterior dimensions, the assembled weight, the narrowest usable space, ring and gap options, exact material, care instructions and a clear removal method. Product photos can show shape but rarely prove scale, finish or daily fit. When a listing omits a decision-critical fact, ask the seller or remove that design from the shortlist instead of filling the gap with an assumption.
Use the first tests to challenge the choice
Assemble and unlock the device off the body, then run an unlocked fit and short waking session. Include sitting, walking, bathroom alignment, cleaning and complete removal. The purpose is to look for reasons the design may not suit the wearer, not to confirm a purchase emotionally. Record pressure, movement, noise, drying and skin recovery. Only a repeatable, uneventful result supports another test.
Check support, returns and replacement parts
Read hygiene-related return limits before body contact and confirm whether rings, spacers, locks or other fit-critical parts are available separately. Clear technical support can matter more than a long feature list. Photograph a manufacturing defect before attempting any repair, and do not modify an unknown material or locking component while it is worn.
Continue with the relevant ChastityNow guides
The bottom line
Open versus closed is a trade-off between exposure and coverage. Compare the exact openings, contact surfaces, cleaning route and fit instead of choosing by category alone.
This article belongs to the Chastity Cages library, where the surrounding guides cover the wider topic.
Front Opening and Overall Coverage Are Different Questions
“Open” answers two unrelated questions, and listings blur them. Front opening: does the design provide a dedicated urination/ventilation aperture at the tip — the Chainmail Steel’s documented 15 mm opening is the explicit example. Overall coverage: how much of the enclosure is bars-and-mesh versus solid shell — the adjustable Chainmail’s open weave versus a closed resin tube. A cage can be open-coverage with a small front hole, closed-coverage with a large vent, or any combination; the two rows are independent.
Compare them separately in your shortlist: front opening against your anatomy’s alignment needs (the bathroom guide covers the practical test), coverage against your cleaning and airflow preferences. A resin kit like the Viper’s sits at closed-coverage with vent holes; the steel mesh sits at open-coverage with a stated aperture. Different rows, different questions, both answerable from listings that document them.
The Viper Chastity Cage V7.0 EVO
Choose the Viper V7.0 EVO for a nylon-resin kit with four base rings. One selected cage, a lock with two keys and a safety pin are included, giving you a clear starting set without buying each ring separately. Select the cage size on the product page.

Chainmail Steel Chastity Cage
Choose the Chainmail Steel Cage for its open chain-link design and a package with one cage, one selected ring and a lock with two keys. It is a different product from the Adjustable Chainmail model, so choose the ring option on this listing rather than assuming the ring adjusts.