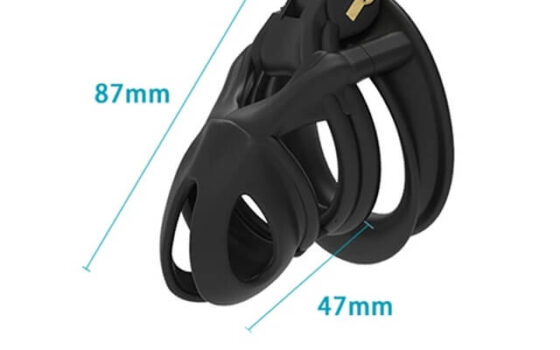
A non-graphic fitting sequence for common ring-based cages, with special attention to cleanliness, pinching, alignment and removal.
This guide is not medical advice. Stop use if significant pain, numbness, swelling, discoloration or circulation concerns occur.
Device designs vary, so the manufacturer’s instructions take priority over a generic sequence. Hinged rings, belts, piercing-secured devices and electronic systems may require different steps. This guide describes a typical two-part ring-and-cage design.
If the components are unfamiliar, review the parts and their purpose before fitting.
1. Prepare the space and device
Choose a warm, private place with good light. Wash your hands, body and device, then dry everything. Lay out the ring, cage, pins or spacer, lock and both keys. Inspect seams, vents, hinges and contact edges.
Practice connecting and unlocking the parts off the body. Do not proceed with a damaged component or a lock that works inconsistently.
2. Fit the base ring without forcing it
Follow the device instructions for a solid, split or hinged ring. Move slowly and keep skin clear of hinges. The ring should sit along the measured path without creating immediate concentrated pressure.
If the ring cannot be placed calmly or closes only by trapping tissue, stop. A different size, shape or ring design is required.
3. Position the cage body
Remain relaxed. Guide the penis into the enclosure according to its opening and shape. A small amount of maker-approved lubricant may help with some designs, but it should not be used to force a narrow cage or hide roughness.
The body should sit naturally inside rather than being stretched forward. Check front-opening alignment before connecting the cage.
4. Join the cage and ring
Bring the parts together while watching the gap, pins and lower edge. Use a mirror if needed. Sweep a fingertip around the connector to confirm that no skin is caught. The parts should align without compression or sudden force.
Never use the lock to pull misaligned pieces together. Disconnect and reset.
5. Test before locking
Keep the device unlocked and stand, sit, walk and bend. Confirm that the connector does not pinch and the ring does not twist sharply. Use the bathroom and verify that removal remains simple.
Compare observations with the full fit checklist. The click of a lock should not be the first time you discover a movement problem.
6. Lock and perform a final check
Insert the tested lock without pushing tissue toward it. Tug only lightly enough to confirm engagement. Store the normal key and emergency method exactly as agreed. If a partner is involved, confirm the check-in and stop language once more.
Keep the first locked session short and awake. The beginner guide to starting without rushing explains the next stage.
Common setup problems
| Problem | Response |
|---|---|
| Ring pinches at hinge | Remove and reassess ring design/size |
| Cage will not meet the ring | Do not force; recheck length, gap and positioning |
| Skin catches at a pin | Disconnect, free tissue and inspect alignment |
| Front opening misaligns | Review enclosure length, width and position |
| Lock will not release reliably | Do not wear until repaired or replaced |
Removal rehearsal belongs before insertion
Set a timer and unlock the assembled device from several angles off the body. Identify the key by touch. If the mechanism needs a precise alignment, practice until it is predictable. Keep adequate light and privacy for the first fitting.
After removal, count the parts and inspect the lock channel. A missing spacer, key or pin can turn the next setup into improvisation.
Grooming is optional
Total hair removal is not required and fresh shaving can create irritation. If hair catches, cautious trimming and careful positioning may be preferable. Do not fit a device over broken or freshly irritated skin.
The Getting Started collection separates orientation, device knowledge and action plans so each question has one clear answer.
Lock only after the fit works
Putting on a cage is an assembly and fit check, not a race. Prepare, fit the ring, position the enclosure, clear the connector, move unlocked and lock last. If any step depends on force or ignored discomfort, stop and correct the setup.