A step-by-step plan that moves from curiosity to a short first trial while keeping consent, fit, cleaning and removal access clear.
This guide is not medical advice. Stop use if significant pain, numbness, swelling, discoloration or circulation concerns occur.
A useful plan removes decisions from the moment of excitement. It tells you what to discuss, what to test and what will make you stop. It also separates stages that beginners often compress into one evening.
If you want a broader orientation before following steps, read male chastity for beginners. The plan below assumes all participants are adults and that no one is being pressured into a role.
Step 1: define a modest first goal
Choose one outcome you can observe: wearing an unlocked device around the house, completing a two-hour locked trial, or testing a simple no-release agreement without a cage. Avoid starting with a calendar month or an identity label. A modest goal lowers pressure and helps you notice practical information.
Write down what would make the attempt successful. Comfort, clear communication and an uncomplicated removal are better first metrics than duration.
Step 2: agree boundaries and stop conditions
Discuss who controls the normal key, who controls the emergency key, whether photos or messages are allowed, and how either person can pause. Name physical stop conditions and emotional ones. “I want to stop” is sufficient; it should not require a medical justification.
If a partner does not want to keyhold, do not turn the conversation into a sales pitch. Solo exploration is available, and consent to a relationship is not consent to every dynamic within it.
Step 3: understand the equipment
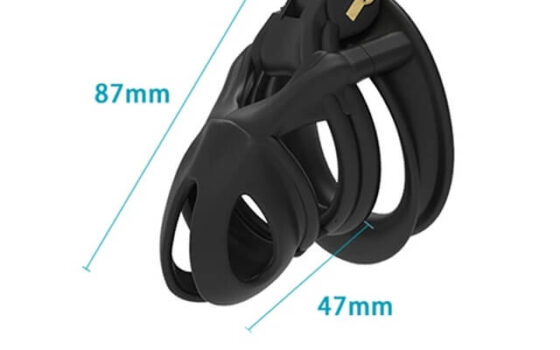
Identify the base ring, cage body, gap system, pins and lock. Assemble and unlock everything several times. Check seams, edges and hinges. Confirm material-care instructions and whether the lock can get wet.
The guide to chastity cage parts provides the vocabulary. Do not improvise around a damaged, sharp or uncertain mechanism.
Step 4: measure and choose cautiously
Measure while relaxed and repeat on more than one occasion. Record ring circumference, resting length and width, then check how the specific maker defines device dimensions. If a kit offers multiple rings or gaps, that flexibility can be valuable while learning.
Use the device-choice guide to compare fit, material, profile and hygiene rather than choosing the most visually intense option.
Step 5: run an unlocked movement test
Fit the clean device without locking it. Wear it long enough to stand, sit, walk, bend and use the bathroom. Remove it if it pinches or shifts sharply. Afterward, inspect the skin and device in good light.
Change one variable at a time. If you change ring, gap and cage length simultaneously, you will not know which adjustment helped.
Step 6: prepare the first lock
| Prepare | Why it matters |
|---|---|
| Quiet daytime window | You can observe fit without work or sleep pressure. |
| Clean, dry device | Reduces friction and makes inspection clearer. |
| Working key and spare | Prevents a minor fit issue becoming an emergency. |
| Water and bathroom access | Lets you test routine function normally. |
| Agreed check-in | Keeps partnered play communicative. |
Step 7: keep the first session short and observable
Lock only after the unlocked test feels stable. Stay awake and in a familiar place. Check after movement and bathroom use. Mild awareness of a new object is expected; growing pressure, pain, numbness or circulation changes are not a training target.
Unlock at the planned time even if everything feels fine. Completing the review cycle builds more confidence than extending impulsively.
Step 8: review before progressing
Record what happened: pressure points, movement, cleaning access, mood, communication and removal. Decide whether the next action is another identical trial, an equipment adjustment, or a pause. Add only one new challenge at a time—longer daytime wear before sleep, and ordinary home wear before work.
Review keeps curiosity from becoming an automatic escalation. A repeatable short routine is a stronger foundation than one difficult session.
A first-week example without a duration target
On one day, learn and inspect. On another, fit the ring and cage unlocked. Later, try a brief daytime lock at home. Leave space between sessions for skin recovery and reflection. Only repeat when the previous stage produced no unresolved issue.
This is intentionally not a seven-day escalation chart. A fixed schedule can make someone continue because the calendar says so. Use completion gates: comfortable movement, normal bathroom use, clean removal and active consent.
What to write in the review
Record configuration, activity, pressure location, cleaning, emotional response and whether the key plan worked. Avoid vague notes such as “fine” or “bad.” Specific observations make the next choice smaller and safer.
For definitions, equipment basics and first-session planning, use the Getting Started hub as the wider reading path.
The start plan as decision gates
| Gate | Evidence needed before moving on | If it fails |
|---|---|---|
| Agreement | Specific boundaries, stop language and key access | Pause before buying or fitting |
| Equipment | Known parts, smooth finish, working removal | Replace or clarify the setup |
| Unlocked fit | Stable sitting, walking, bathroom use and removal | Adjust one component and retest |
| Short locked session | No warning signs; consent and routine remain easy | Unlock, document and reassess |
| Repeat | Same setup is predictably uneventful | Do not add time or a new setting |
This gate structure prevents a calendar from making decisions for you. A step is complete only when its evidence is clear; waiting or ending the experiment is a valid result.
Start with the sequence, not the streak
The safest answer to “how do I start?” is a sequence: purpose, consent, equipment, measurement, unlocked test, short lock and review. Follow that order until the process feels ordinary. Longer wear is optional and should never arrive faster than your evidence.